This is the first of a series of articles about Vaultwarden on Azure Container Apps:Introduction
If you want to get rid of the hassle of managing your passwords in Excel or you want to dump LastPass (after the latest breach), 1Password or other cloud-based solutions you should take a look at Vaultwarden.
It is a Bitwarden clone. Bitwarden is a cloud password manager, but it is also open source and can be self-hosted. You can run it on your own server or in the cloud. However it is under your control and you can decide what to do with your data.
Vaultwarden is an unofficial Bitwarden server implementation written in Rust. It can be run for example on a Raspberry Pi or in a Docker container and you can make it public or run it in your own private/home network.
In this article, I will show you how to deploy Vaultwarden on Azure Container Apps for less than 1 EUR per month (if you do not want the extra network security. Otherwise Azure automatically creates a load balancer for ~18$/month).
UPDATE: I was wrong regarding the pricing. I’ve set the scaling to minReplicas=1 which means there is always one running instance. This is then ~10EUR/month. It is only cheap as 1 EUR if you scale to 0 instances if there are no requests. I’ve updated the bicep/arm template to use 0 as the minReplicas setting.
Important note about the storage
Vaultwarden stores all data in a SQLite database within the file system (encrypyted of course). I’m using a file share in a storage account which will be mounted as a volume in the container. This way the data will be persisted even if the container is restarted or the container app is deleted. If you run it without a mounted volume, all data will be lost when the container is restarted.
In the Vaultwarden repository are some discussions about the SQlite database in an Azure storage account. I’ve tested it and it works fine with WAL enabled. I had to explicitly set the ENABLE_DB_WAL environment variable to true to enable it. If you don’t do this, the database will be locked and you will get an error message when you try to access the web interface.
Prerequisites
First of all you need an Azure account. If you don’t have one, you can create a free account here. You need to enter a credit card to verify your identity, but the solution will cost you less than 1 EUR per month (if you are using it for personal use with your family members).
Create the Azure resources
Update: You can now decide whether you want virtual network integration or not. If you choose virtual network integration Azure automatically creates a loadbalancer for you which you have to pay for.
You can do this within the Azure portal directly, however there are some things that are not possible right now in the UI (like mounting a file share as a volume in the container app).
Therefore I’ve created a Bicep template that will create the following resources:
- Virtual Network (optional)
- Storage Account including a file share (where Vaultwarden will store the data)
- Log Analytics Workspace (for monitoring/logging)
- Container Apps Environment (smallest version is more than enough) (for hosting the container app)
- Container App
You can find the Bicep template and instructions how to deploy it here or you can just click this button:
![]()
The container app references the vaultwarden docker hub image and will run it automatically. You can customize the installation by setting some environment variables. All configuration options can be found here in the Vaultwarden wiki
The storage account only allows access from the virtual network where the container app resides if you choose to enable virtual network support.
Issue with Vaultwarden on Azure File Share
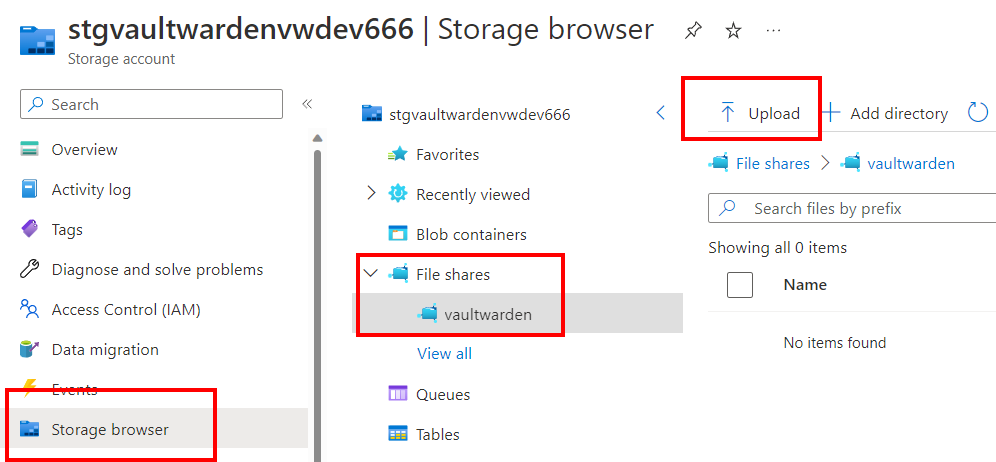
There is an issue with the SQLite database on an Azure File Share. The database cannot be created automatically. Therefore you need to put an empty Vaultwarden database upfront into the file share.
⚠️ Important: Before you can proceed make sure to make the storage account accessible. Go to the storage account Networking tab and check Enabled from all networks. After you copied the files as decribed below, make sure to switch back to Enabled from selected virtual networks and IP addresses.
Here is an empty database that you can use. Just download the zip file, unzip all 3 files and upload them to the file share:
- Go to the Azure portal and navigate to the storage account
- Click on the file share
vaultwarden - Click on
Upload and upload the 3 files
![/images/2023/containerapp2.png]()
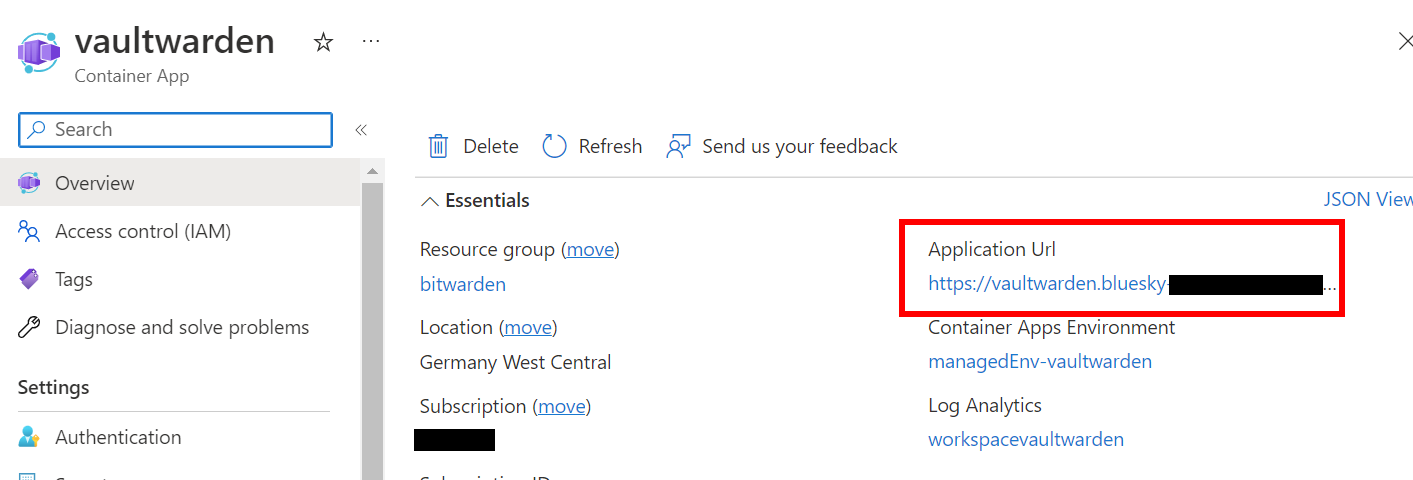
First run
After the deployment is finished and you have created the empty database, you can access the web interface of Vaultwarden by clicking on the URL in the container app overview.
![/images/2023/containerapp1.png]()
You need to register a new user and then you can start adding your passwords.
⚠️ Warning
I recommend to use a strong master password and enable MFA for all users if you are running Vaultwarden on the public internet.
If you have any questions, please let me know in the comments or reach out to me on these other channels.
]]>