I’m a software developer, so today I want to show how to create a development VM in Azure.
Create VM
Go to Azure and create an account if you do not yet have one. If you have an MSDN (aka Visual Studio) subscription log in and activate your free Azure credits right there.
Now in the Azure Portal click Create a ressource and search for Visual Studio. Now select Visual Studio Community Edition which is free or Enterprise if you have an Enterprise subscription. I’ve choosen VS on Windows 10, but you can even select VS on Windows Server 2016.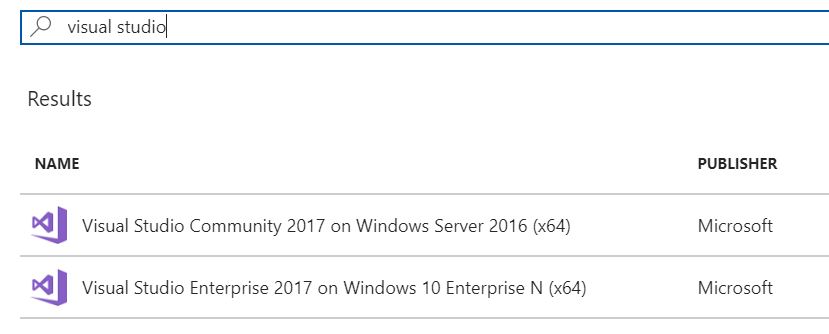
First you have to give it a name and select the storage type. Default is SSD which I also recommend for the best performance. Then enter a username you want to use and a password.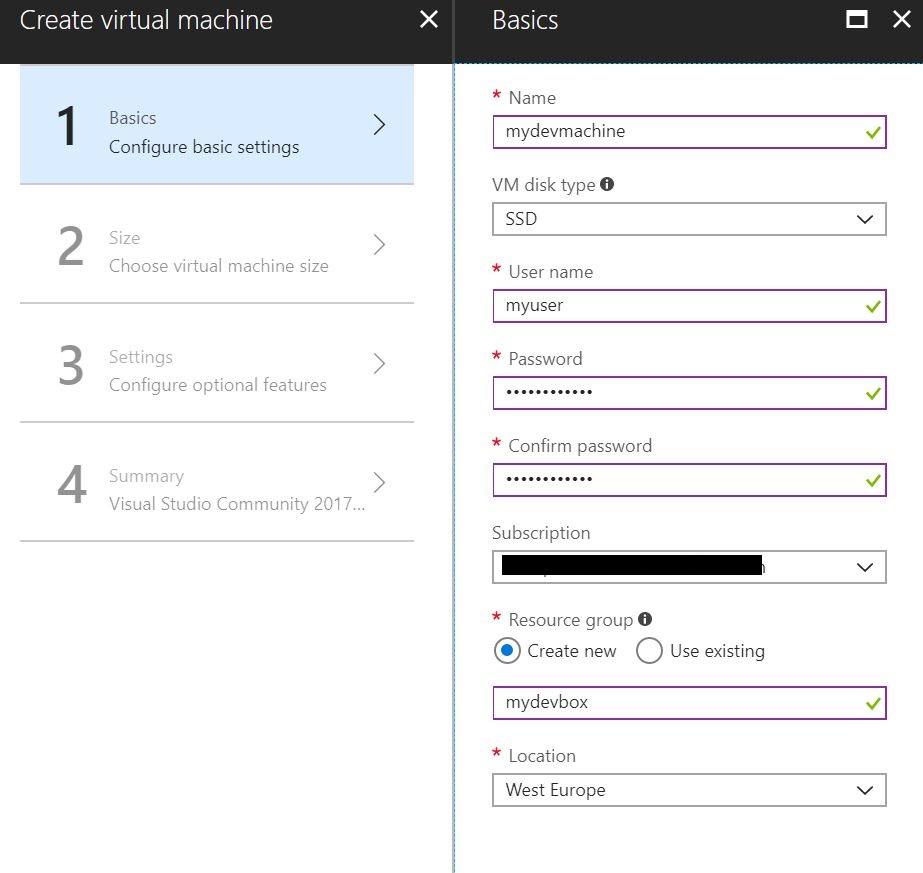
Now you have to choose a size of your new VM. As you can see, there are a lot of options available. The estimated price would be the price if your VM is up and running 24/7 for a month. However, my dev machine will only run if I’m using it, so I can choose a bigger machine even if I have not enough credits to run this machine for an entire month. Each ressource is billed per minute which is awesome. I will go with 4 CPUs and 16GB RAM. So running this machine for one hour will cost me about 0,20 EUR.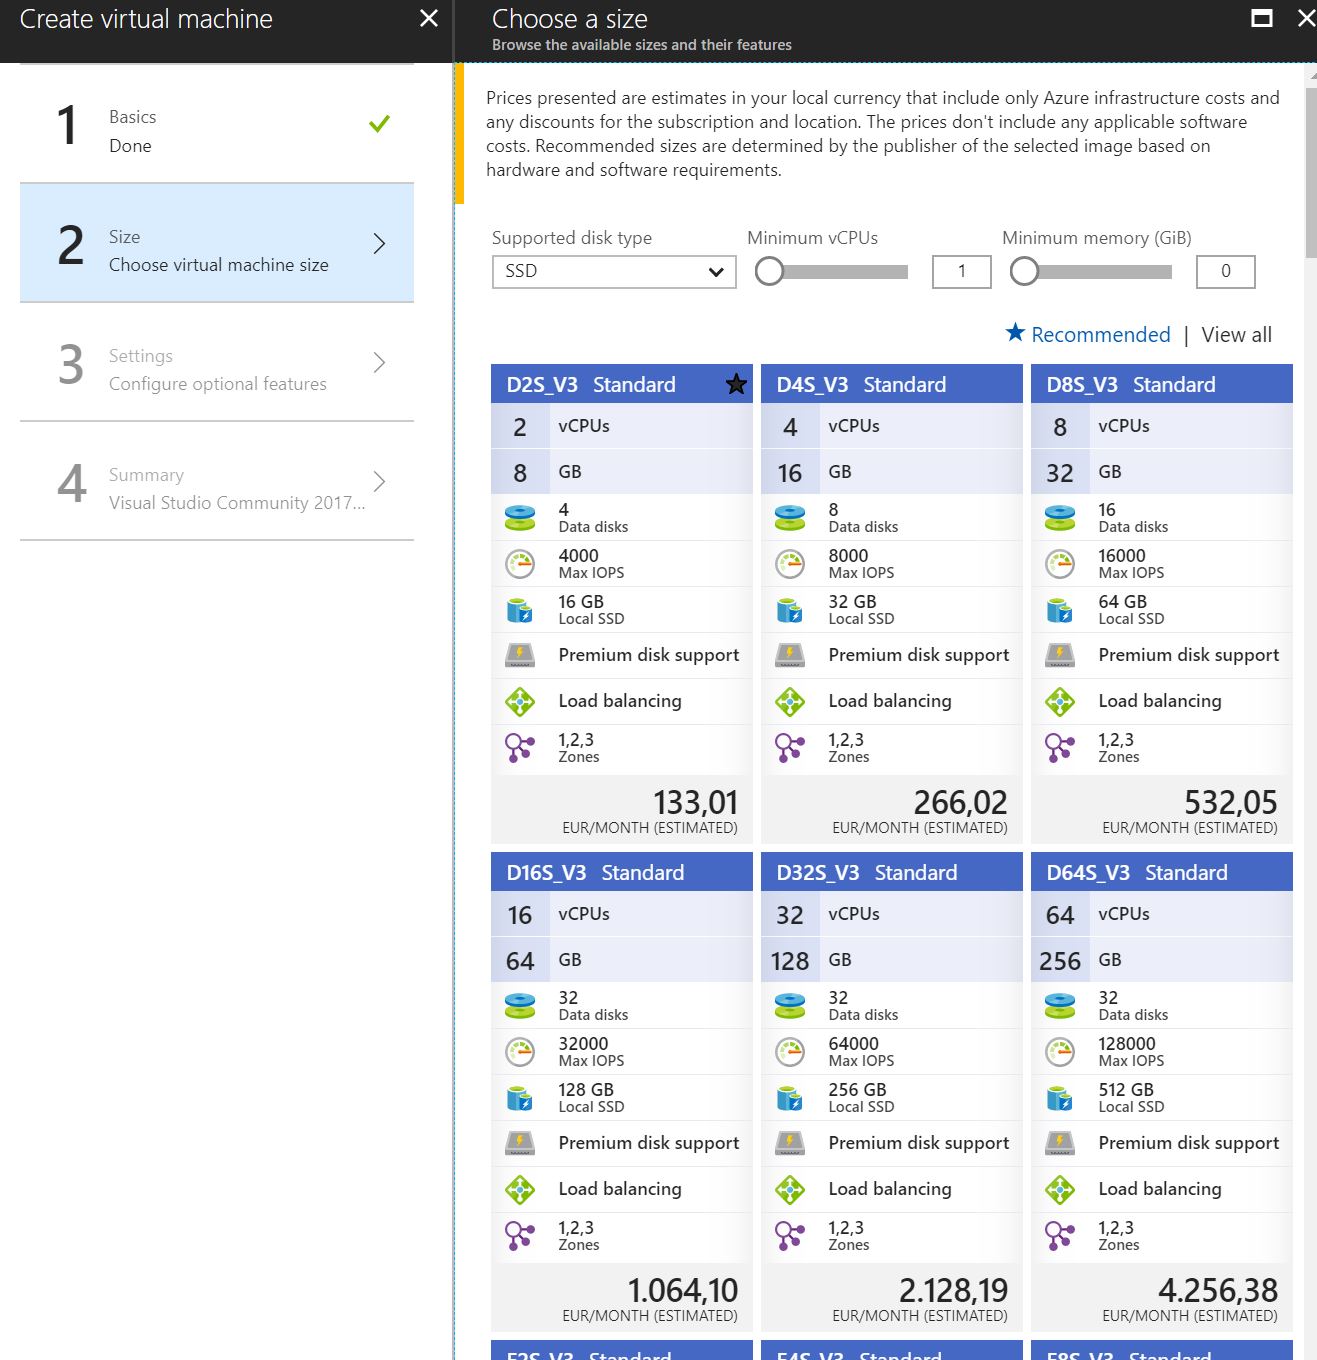
In the last step you can define networking stuff, but I will use the defaults here for now.
Auto-shutdown
Just one setting is really important: Auto-shutdown. As you can see here, I have enabled auto-shutdown and set it to 18:00. That means: Whenever you leave the office and forgot to shutdown your machine, Azure will do it for you at the specified time. You can even send notifications before shutdown which can be configured later.
Networking
Now wait a few minutes until the machine is provisioned.
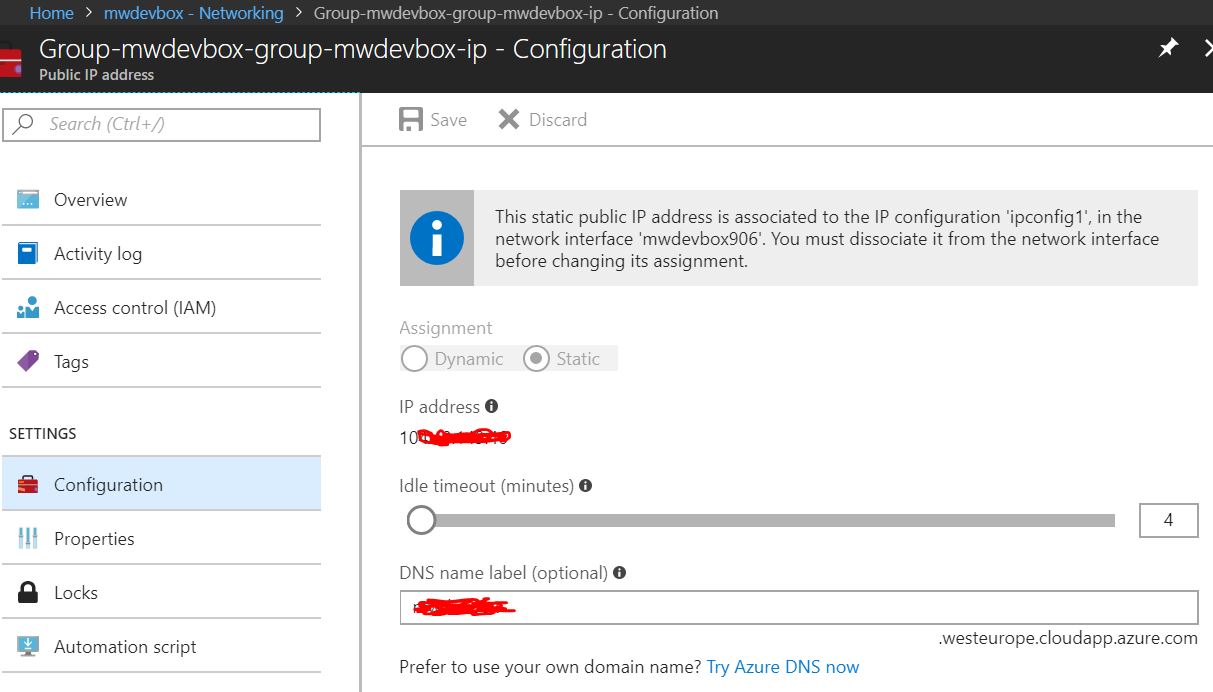
The next step is to set a static IP for your machine and a DNS name if you want to. Click on your VM in the portal and then Networking. There you can see your public IP. If you click it, you can define a DNS name as well and switch from dynamic to a static IP.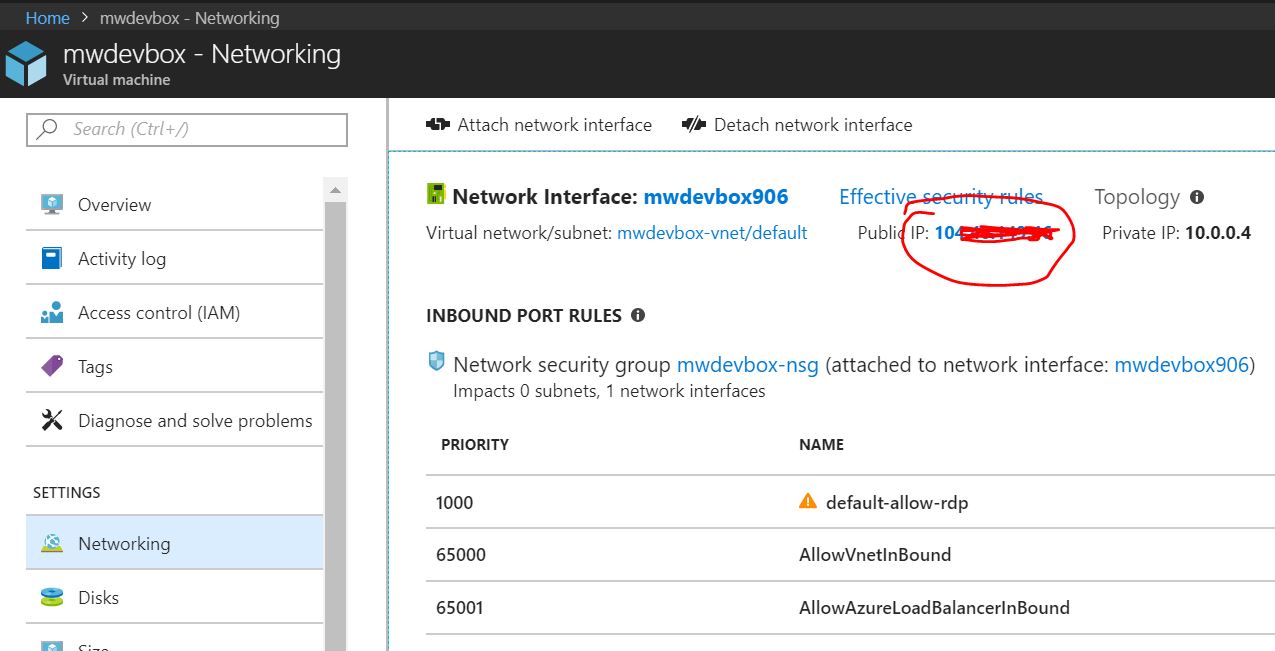
Disks and Backup
Now go to the Disks tab in your VM and add a new data disk. There you can store all data independently from the rest of your VMs OS disk. Also it is on another LUN so you have done everything you can for the best performance ;-)
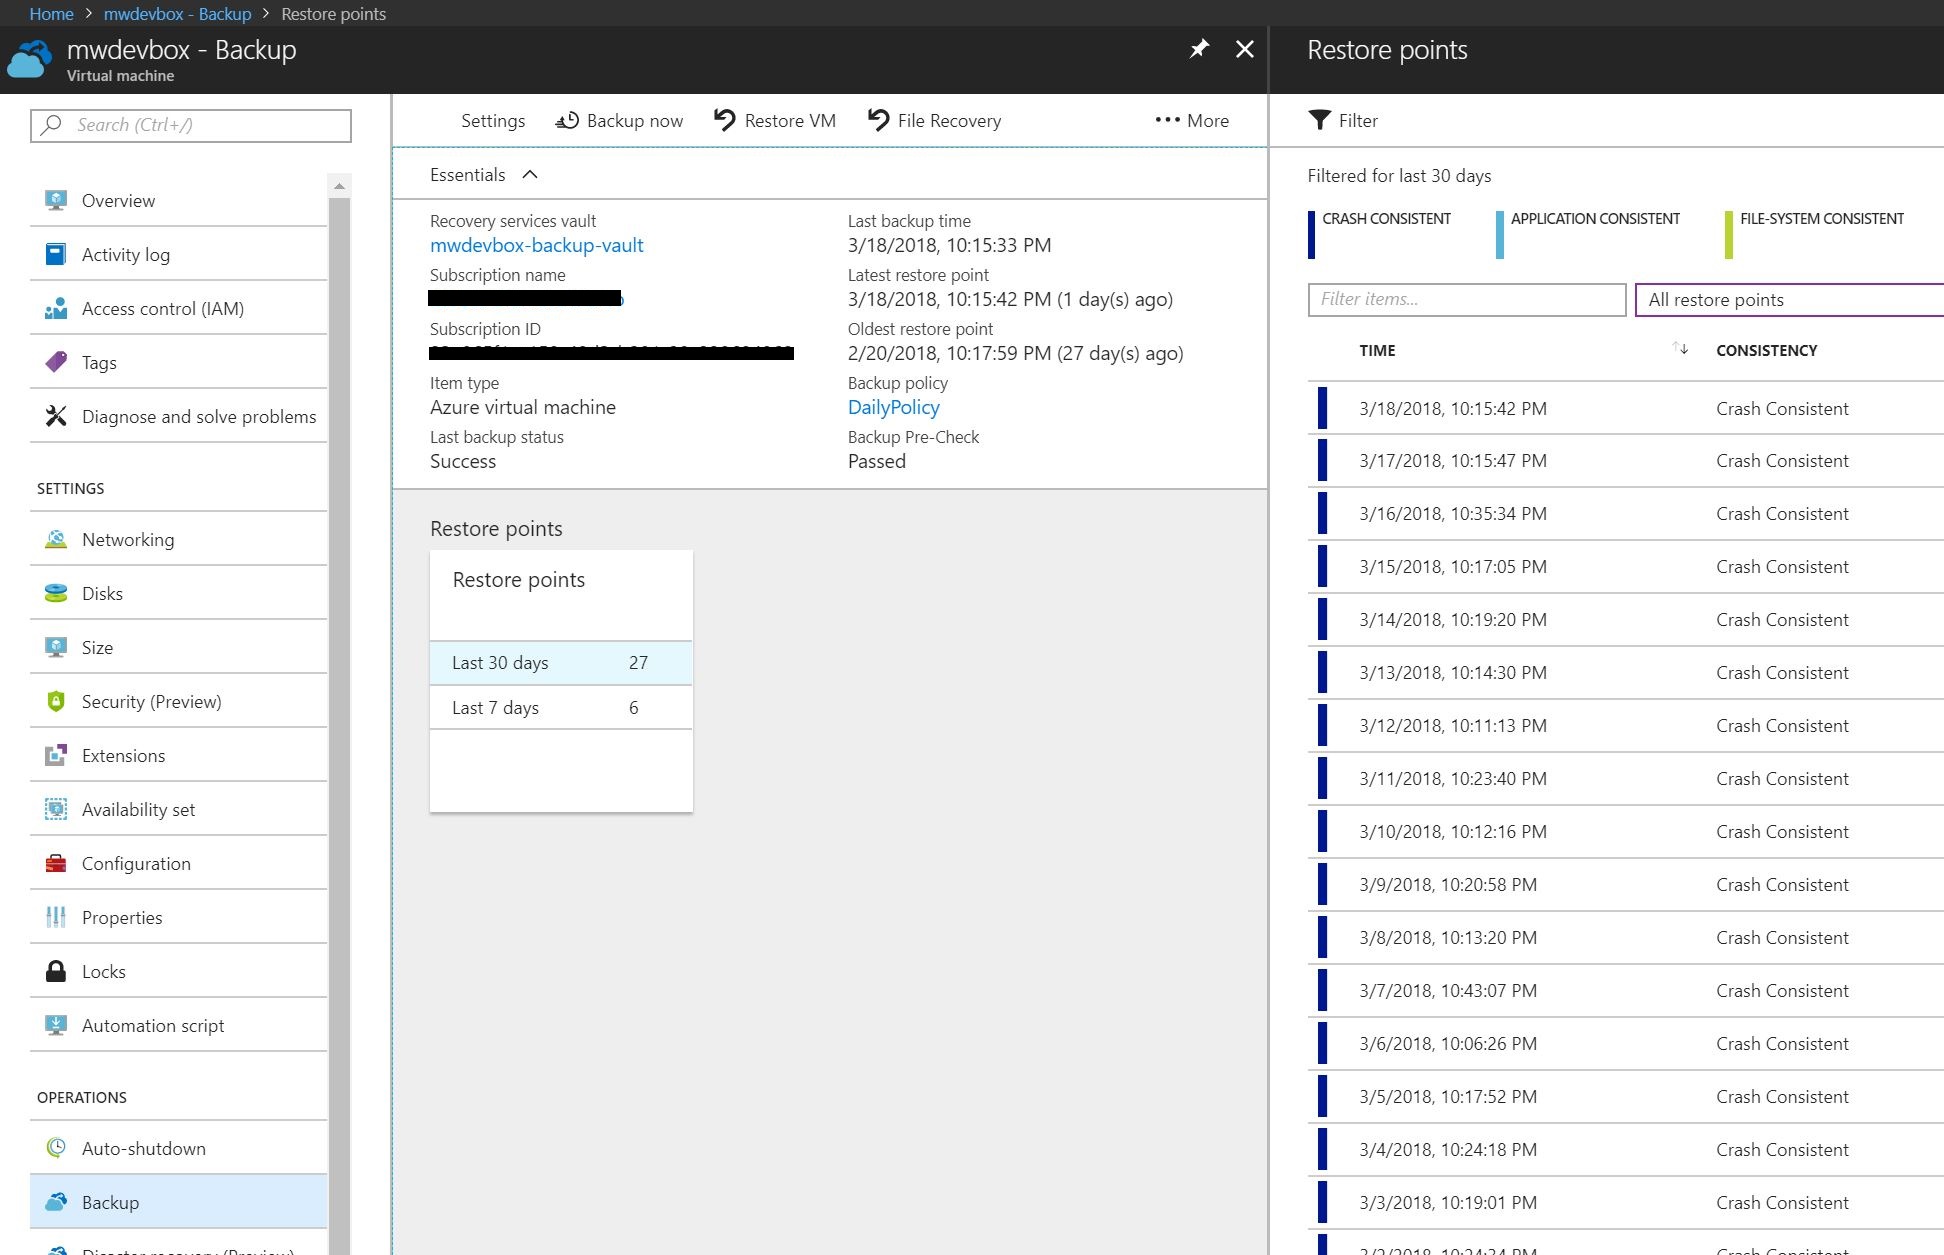
What I’ve done now is to go to the Backup tab and configure an automatic daily backup. With this backup you can restore the VM to any day in the last 30 days. You can even restore single files on your disks. Therefore Azure mounts the disk you selected locally and you can copy single files from the disks. Awesome!
Keep in mind: Disks/Storage and Backup have it’s own price tag, so check that before configuring it.
Using it
You can now Remote Desktop into the machine via the Connect button on the VM overview tab. If you have selected a static IP and DNS name you can connect using them.
Now install all your favorite dev tools within the VM. Visual Studio is already installed but needs to be updated (of course).
How to use Microsoft Flow to start and stop the VM from my mobile
First of all, go to this blog post from Søren Rasmussen. He describes how to automate startup and shutdown of Azure VMs with the help of Azure Automation Services. After you have created the so called runbooks go to the startup runbook, click Webhooks->Add Webhook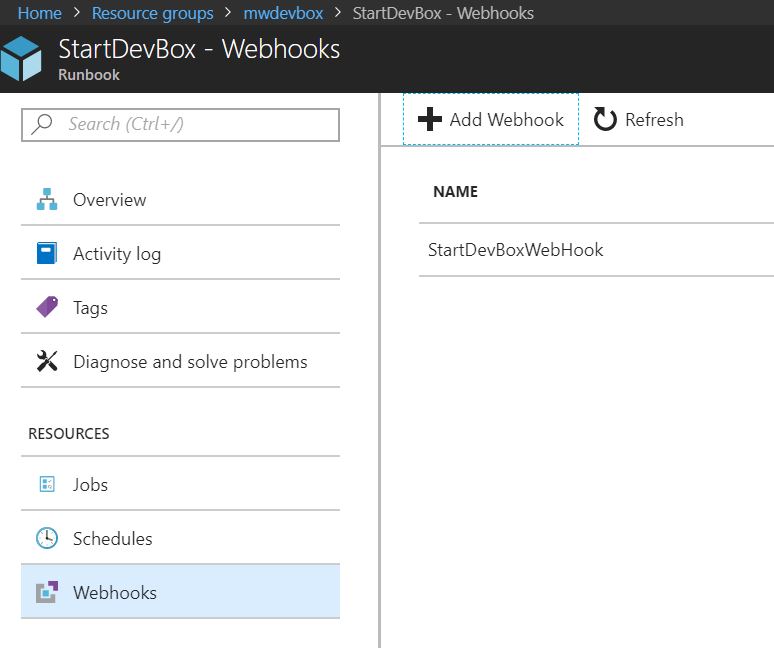
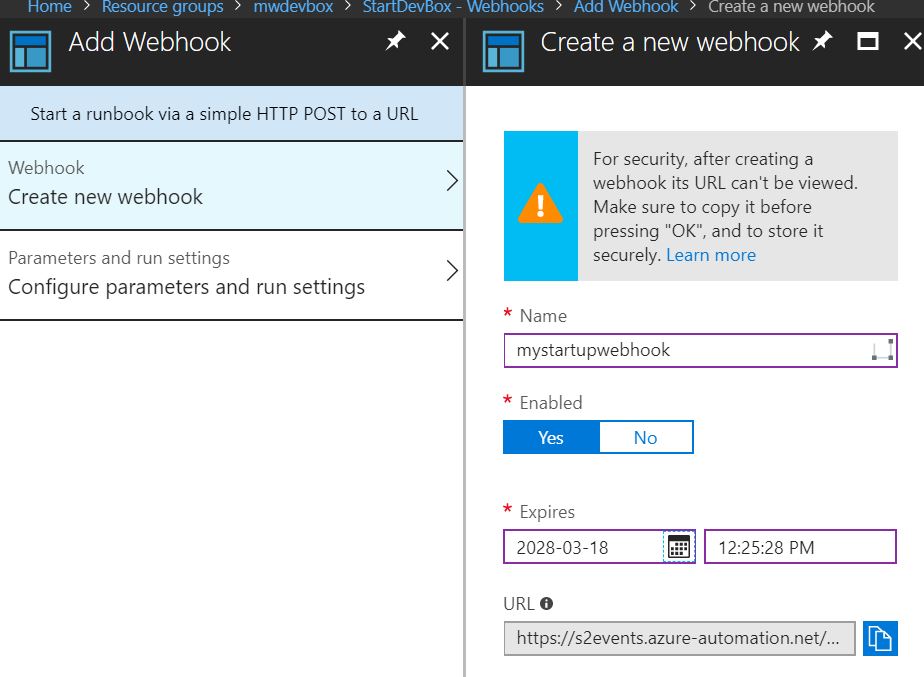
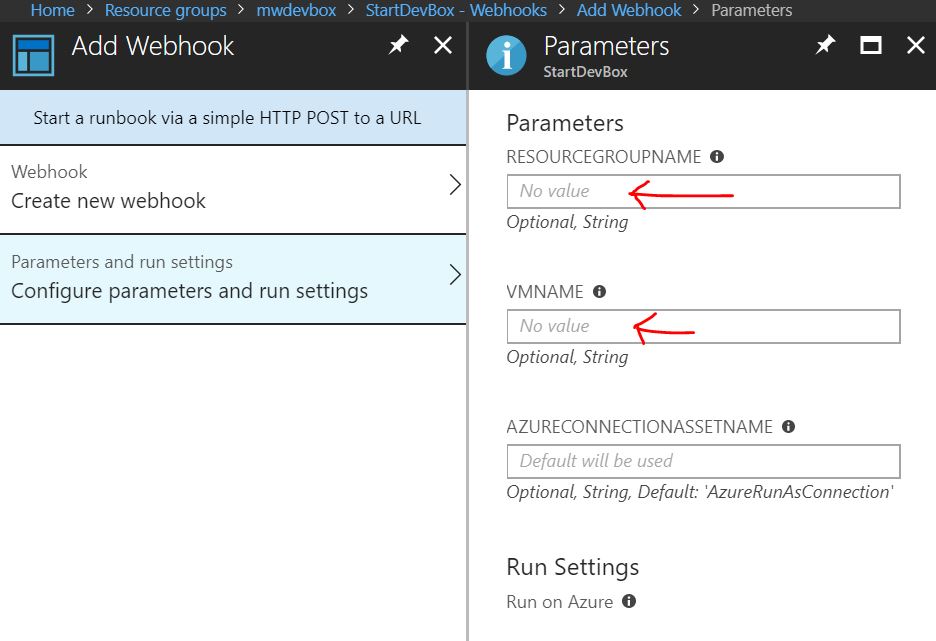
Make sure you copy the webhook URL before clicking OK, because there is no way to see the URL again.
The URL looks like: https://s2events.azure-automation.net/webhooks?token=some-secret-token
Do the same for the shutdown runbook.
Create Flow buttons
Login with your account to Flow. Click on My Flows -> Create from blank.
You should see a Flow button for mobile.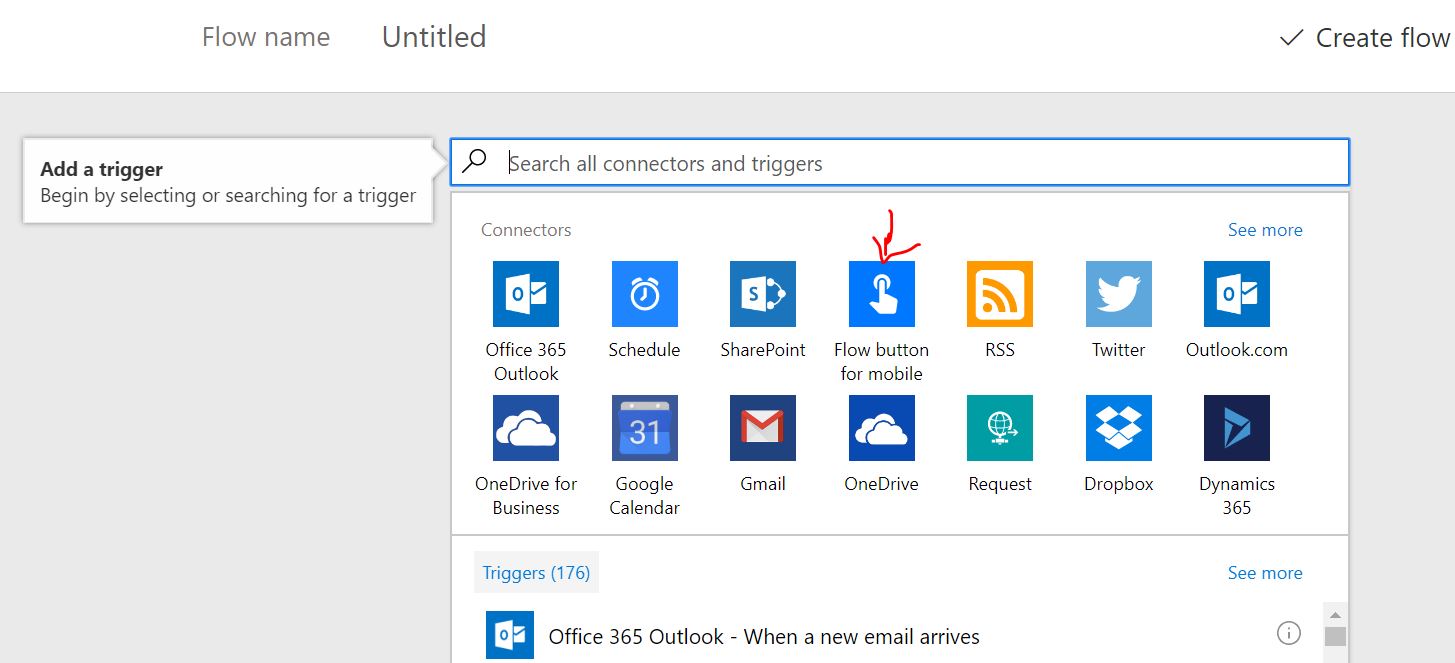
Then add a new action. Search for http and selet POST as the method and paste the webhook URL from your runbook.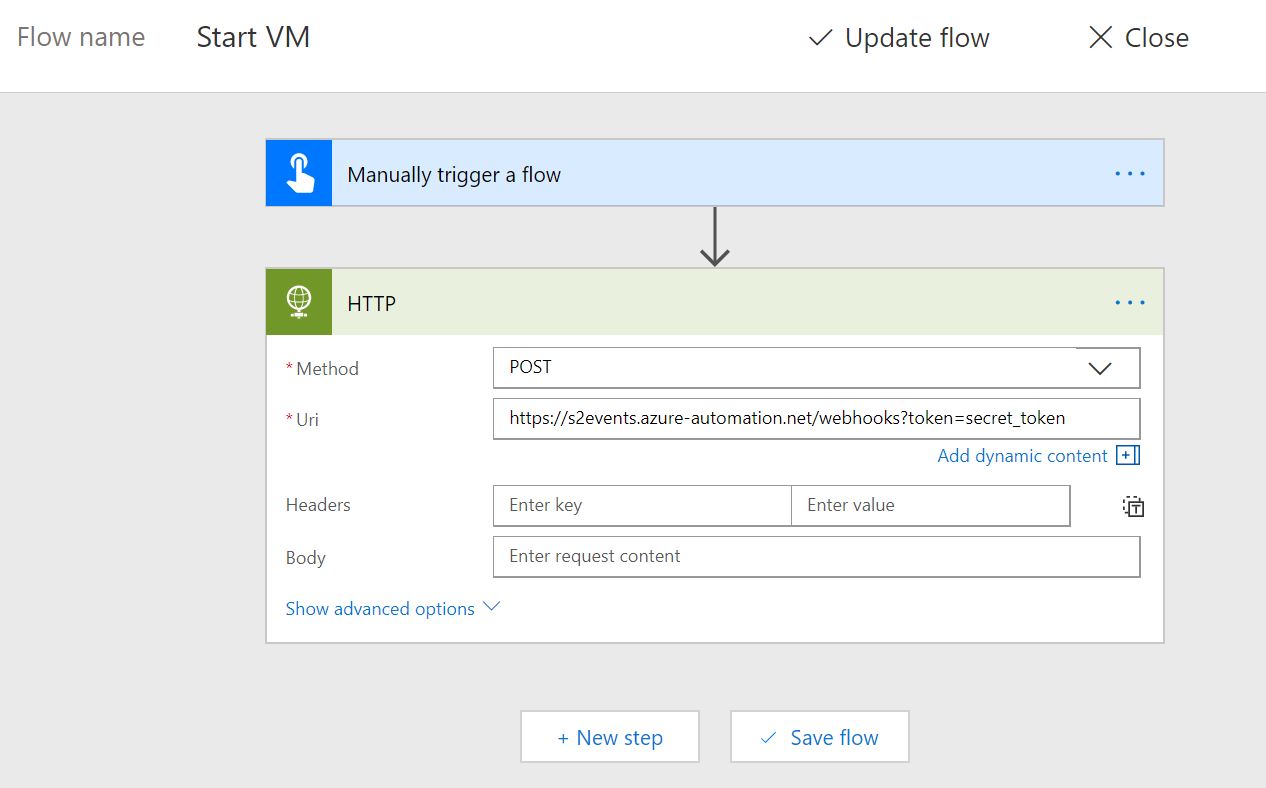
That’s it! On your mobile download the Flow app and there you can see your buttons and start your VM on the way to the office.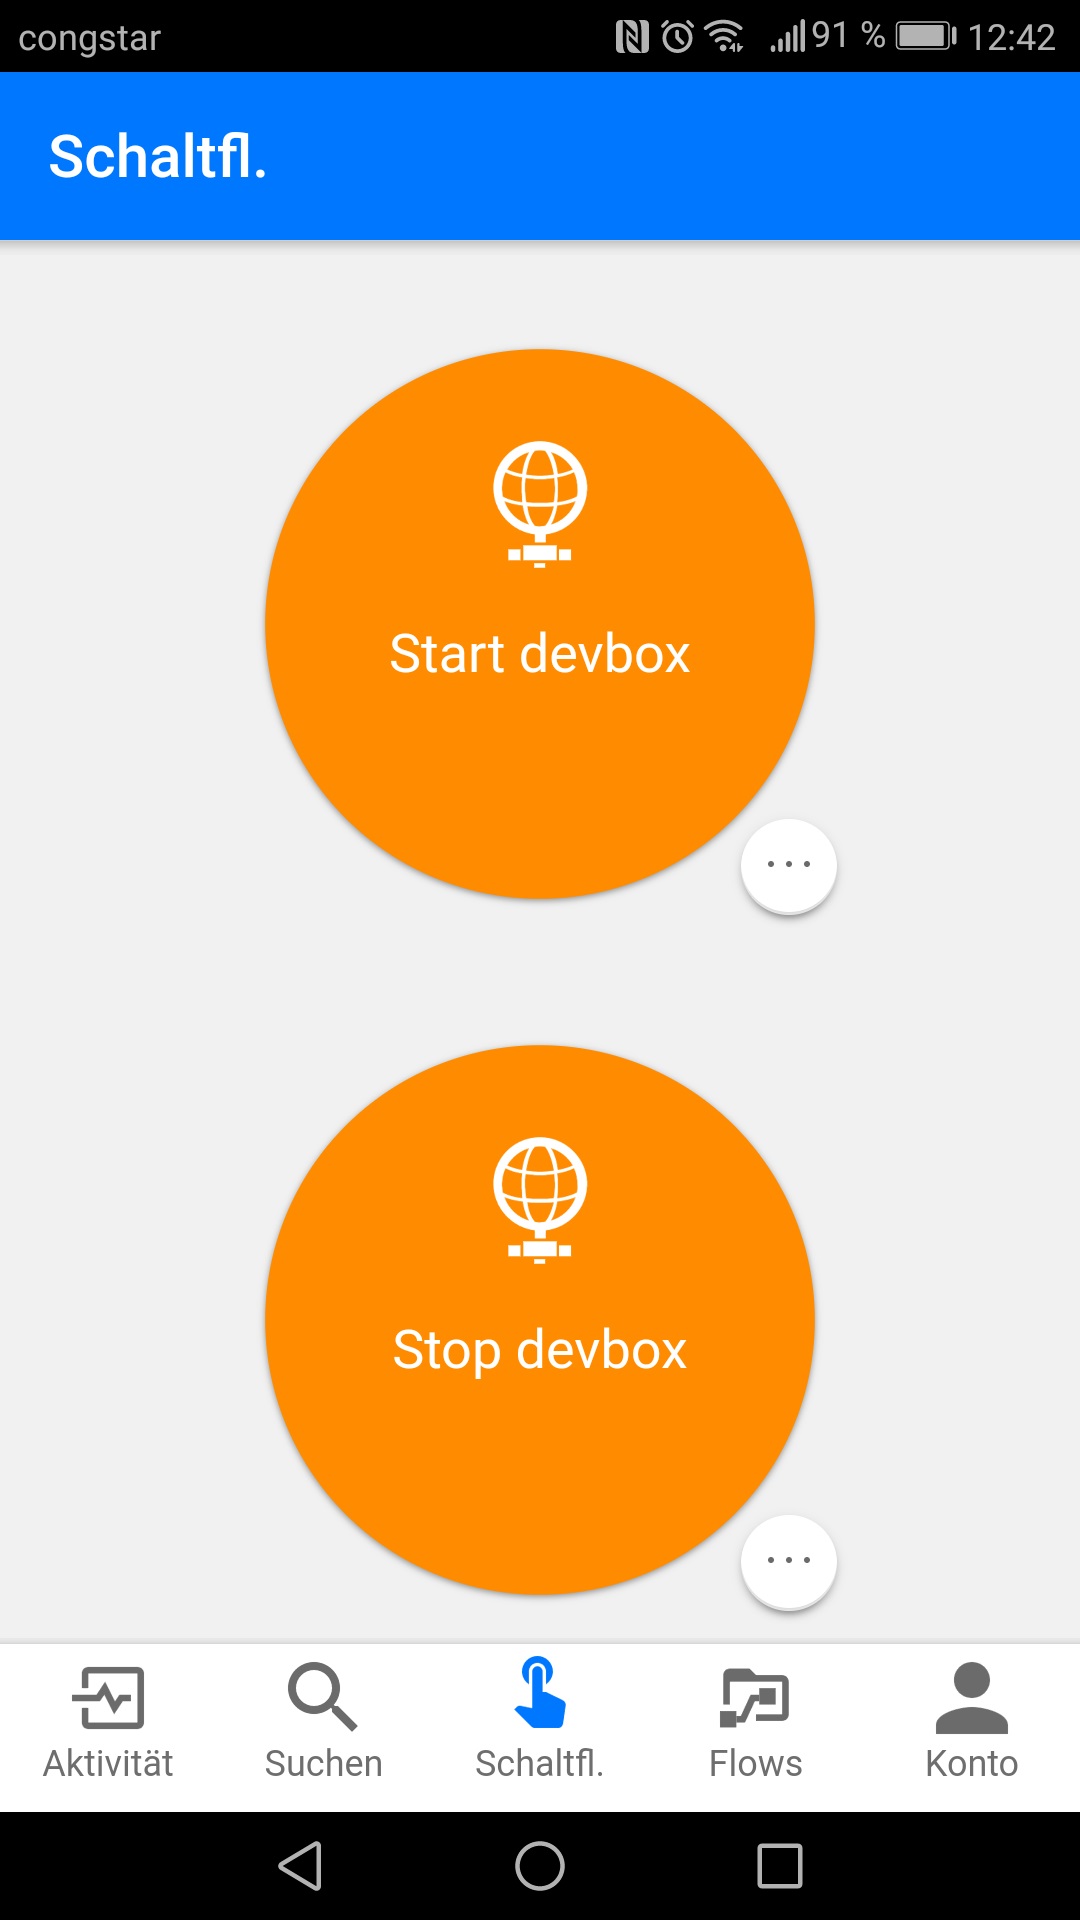
Note: It can take a minute (on my first try it took a few more minutes) to kick of the runbook and start the VM.