I have an Azure VM for development purposes. You can read how I’ve created it here.
Ok so you know how it is setup including the backup part. Backup in Azure is awesome because it is just a few clicks away.
I’m running Windows 10 on the VM and I’ve enabled Insider Previews in the “Slow Ring”.
Not a really good idea.
A few days after the update the VM stopped booting. Here is the Boot Diagnostics screen:
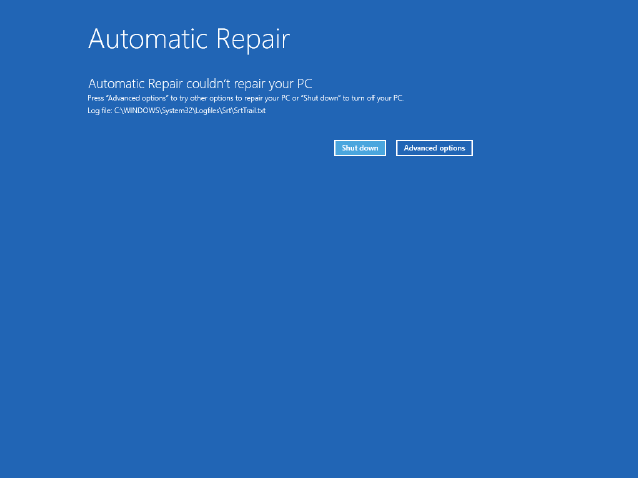
It is a VM so there is no chance to click in this screenshot. Even a reboot did not fix it.
Thankfully, I have the VM backup configured so I can go back with the OS disk before the insider preview was installed.
Restore
Here are the steps to restore the OS disk, but without touching the existing VM and the VM configuration.
Create a new storage account. It will be used as a temp storage for the restored disks. It must be a
Standard(notPremium) tier storage account.Go to the Backup blade and select
Restore VM
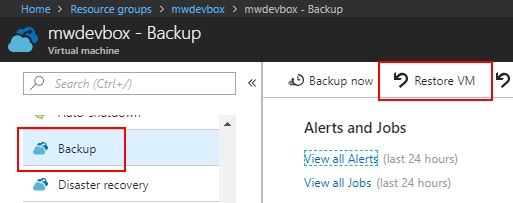
- If you want to keep all your VM settings select
Restore disksas the restore type, then select the storage account created in step 1.
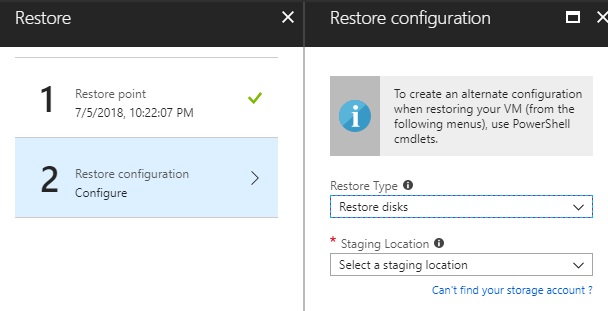
- Wait until the disks are restored. Now you need to create a new managed disk based on the restored vhd file.
Click “Create a new resource” and search forManaged Disk.
Create a new managed disk within the same resource group as your VM and selectStorage blobas the source type. Make sure you select the correct OS type.
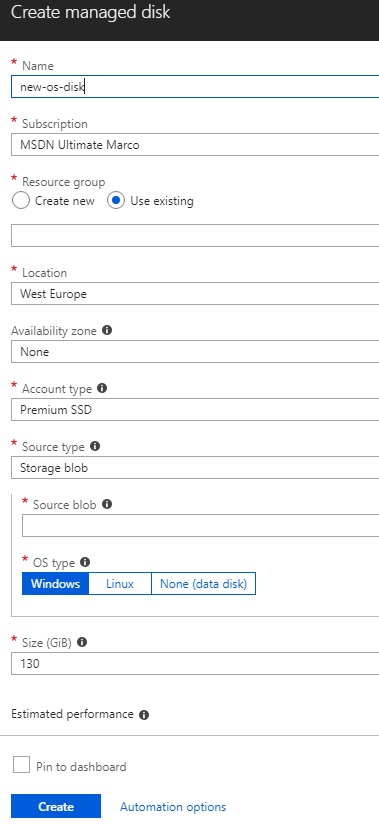
- Now there is only one challenge left: Swap the existing disk with the restored OS disk. A walkthrough can be found in the Azure docs
$vm = Get-AzureRmVM -ResourceGroupName myResourceGroup -Name myVM

$disk = Get-AzureRmDisk -ResourceGroupName myResourceGroup -Name newDisk

Set-AzureRmVMOSDisk -VM $vm -ManagedDiskId $disk.Id -Name $disk.Name

Update-AzureRmVM -ResourceGroupName myResourceGroup -VM $vm
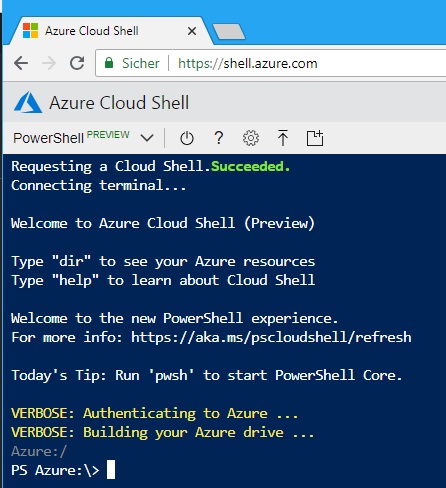
If you do not have and or you do not want to install the Azure PowerShell commandlets, you can just visit https://shell.azure.com to have a shell directly in the browser.
